Photobucket Photobucket Photobucket Photobucket
Showing posts with label tutorial. Show all posts

Thursday, August 18, 2011

Picture Canvas Tutorial

Folks, I am f.r.e.a.k.i.n.g out! I fly back out to school in less than 5 days. 5 days people!

But, being my usual over-achieving self, I decided that there were a few more crafts that I wanted to make for my apartment.

For a friends birthday this past may, I made a picture clock of our most fun memories.
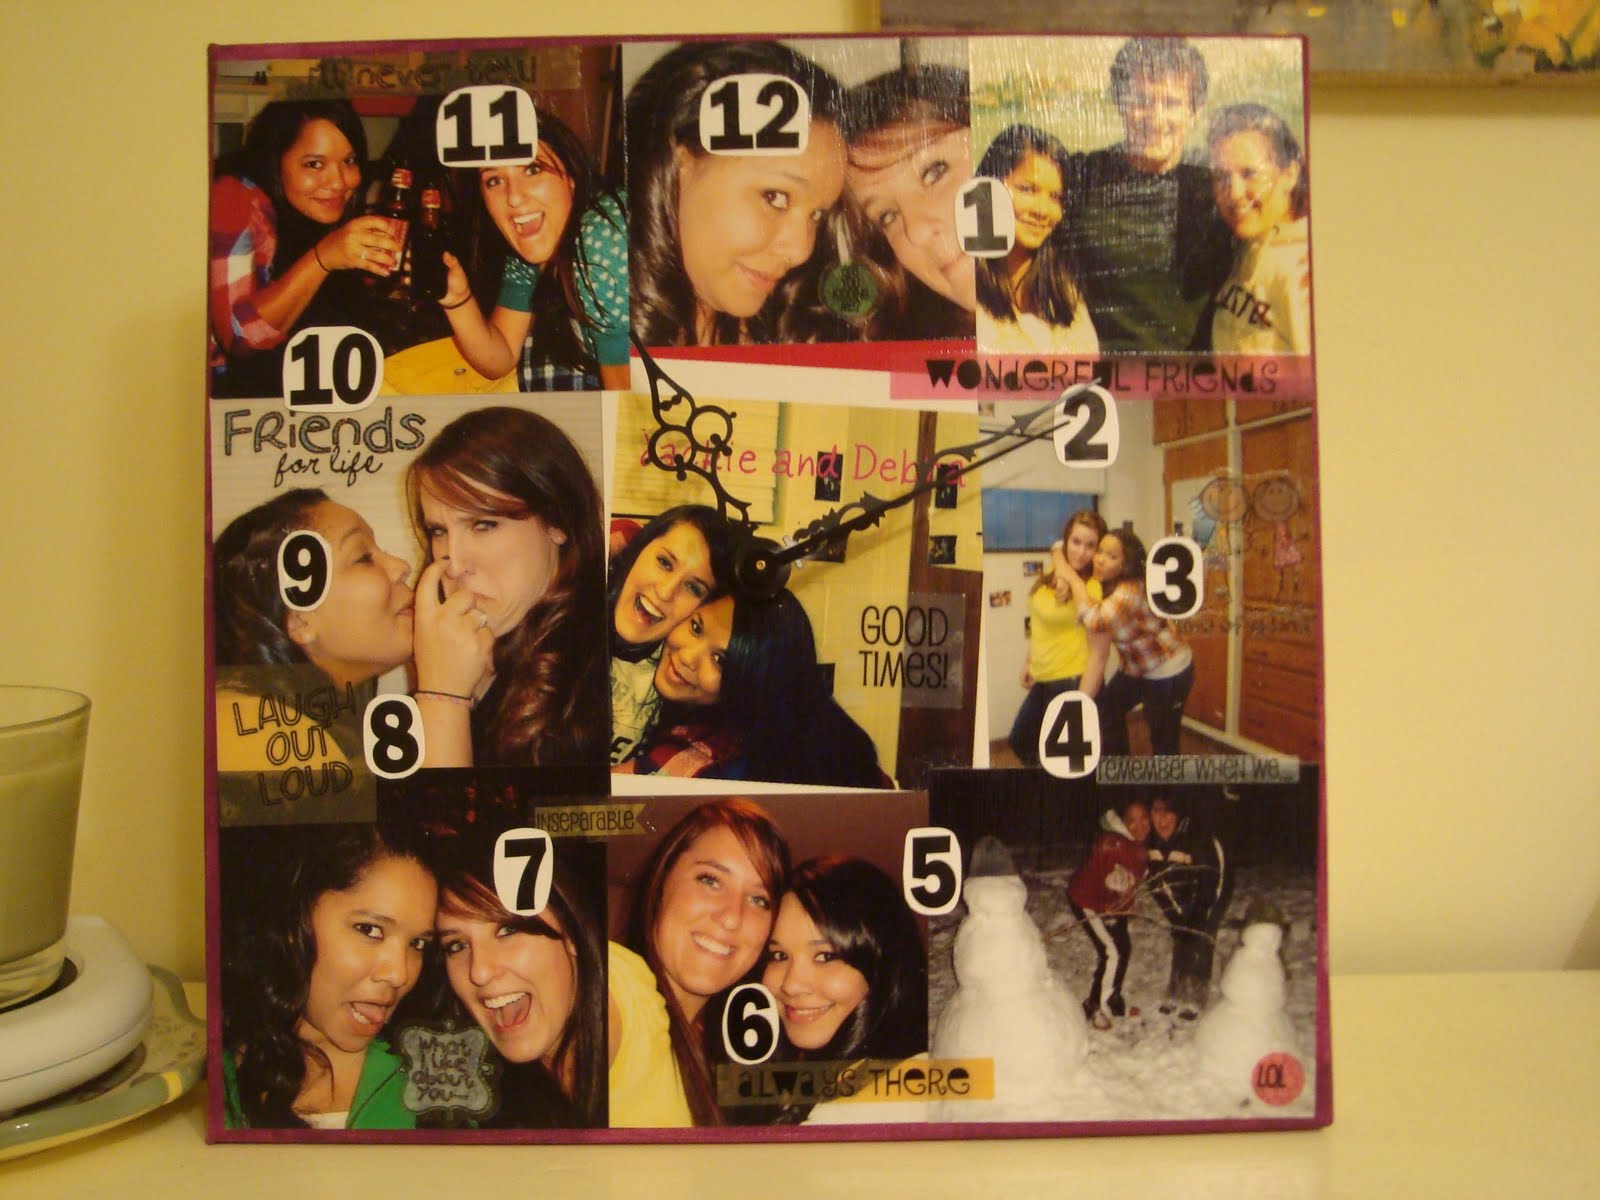

Shyler loved it and I was pretty happy with the way it turned out. It is colorful, fun, practical, and full of memories :)

I decided that I wanted to make a picture canvas of my own, minus the clock. So, I went to my local Hobby Lobby yesterday and got all of the necessary supplies.

Do you wanna know how I made it?

You will need

 A canvas (whatever size you prefer)
Pictures
Mod Podge
A paintbrush
Paint (optional)
Fun Scrapbooking Stickers (optional)

How-to

1. I decided to paint my canvas so I would have color on the outside edges. This is completely optional though, so do whatever your little heart desires.

Sorry, I didn't think about doing a tutorial until I had already started......but imagine that the canvas is blank :)

2. Paint, or don't paint, your canvas :p

Notice that it does not have to be perfect, it will just be covered by pictures anyway.

3. Here comes the fun and time-consuming part. You have to go through all of your gorgeous (because let's face it, you're all supa dupa pretty), fun pictures and find the ones that you like the best :)

4. Once you have picked out some legit pictures, you are ready to design your canvas. I like to mix and max some pictures before I make a decision.

The big white circle is due to the flash on my camera....I need to learn how to take better pictures!

5. Ok, now that you have done all of that, you are ready to Mod Podge it all on.

I was probably the kid in Elementary School that huffed glue because I LOVE the smell of Mod Podge.....just sayin'.

6. After all of your pictures are glued down, take your Mod Podge and go to town on the front of your canvas. You want to make sure that everything is nice and sealed.

*Before I did this, I decided to add a few scrap-booking stickers to my canvas.


7. Do not be alarmed when you see this:

I promise it will dry nice and clear :)

8. After it dries, you will have a nice way to display some of your favorite photos!


In other news, today was my last day of work and I will miss little miss Isa tons!


I mean, how could you not love a face like that, and legs like these (Isa's, not mine).


Somebody get me a spoon because I could seriously eat her up!......in a totally non Hannible Lecter sort of way of course ;p


Quote of the Day


Stay tuned for another tutorial. I will be attempting to make my first pillow :)

post signature

Wednesday, August 3, 2011

Workless Wednesday


  Today, I had a day off of work, so I decided to be productive and make something for my apartment at school. I am excited to move in and decorate. Leaving my family to go off to school is always hard, so a home-away-from-home is essential. I need a space to 
unwind. A space that makes me feel comfortable instead of somewhere that I cannot wait to leave. 

I was at the craft store Jo-Ann’s with my mom yesterday, when I spotted these paper mache like letters. I was instantly inspired and had different ideas about what I could make. Lucky for me, they were on sale! Double lucky fact is that my roommate’s name also begins with “A”, so it is perfect for our room.

I picked out a pretty fabric and got to work. If you want to make one too…keep reading!

Here’s what you need

001

Opps! I forgot to include hot glue and cardboard…so grab those too! The fluffy white stuff is batting.

Directions

*Disclaimer: This is the way I chose to do it. I’m sure there are much easier ways considering this whole project took me about 2 1/2 hours….yep, not kidding. So, if you have a better idea…please ditch my instructions :)

1.  Ok. Take your paper mache (or whatever the
heck it is!) letter and trace the shape onto cardboard. You will want to do this twice so that you end up with 2 cardboard “A’s” or whatever other letter you use.

003

2. I decided to glue batting to one of my cardboard A’s so that the front of my letter would be padded once it had fabric over it.

004

3. Now, take your fabric and trace the shape of your letter onto the opposite side of your pattern. Make the tracing bigger than your actual letter to leave a little fabric to glue over onto the back of the letter.

005

4. Ok. Now at this point I want you to take a few calming breaths because this is the stressful part. It is time for you to wrap your fabric around the letter…and glue the fabric to the back-side. This part is stressful because you have to pull the fabric and glue the fabric down in such a way that you do not get wrinkles on the front of your letter. You may have to use hot glue in some pesky areas that will not stick.

Once you have done that, you will get something that looks like this.

014

Do the same thing to the other cardboard letter.

5. Now, it is time to prep the actual paper mache letter. You will want to glue fabric down the sides and inside edges of the letter in order to get a uniform look once you place your cardboard pieces on top.

012
013

6. Now the hard part is over! Woohoo!!!! Take your fabric-covered cardboard and glue the pieces onto the paper mache letter. Place some weighted books on top to get a nice seal as it dries.

Place it on a nice shelf and you have a cute new item to add a little color to a room :)

017

Quote of the Day

comewhatmay


Tuesday, July 19, 2011

Happy little paper banner :)

Today, I caught the craft bug, so I scoured the internet for ideas. I wanted to make something that I could hang in my bedroom at college this year. I found this idea for a cute paper banner at My Girlish Wims. Since my bedding is brown and pink, I went with a pink and brown themed banner. These banners are perfect for home decorating, as well as parties.


 I thought that I would do my own tutorial on this project, just in case you would like to make one of your own :)

003

Supplies
-Scrapbook paper
- Double-sided tape
-Ribbon
-Thread
-Scissors

Let’s do it!

1. Take a piece of scrapbook paper and cut it in half.


005

008

2. Fold each half up like an accordion…or paper fan.

009

3. Fold the “accordions” in half at the middle.

011

4. Apply your double-sided tape onto one of your folded edges.

012


Then tape it to your other fan.

013

5. Now, pick up your coordinating, or matching color thread. Wrap the tread around the middle of the fan and tie it so that it is gathered at the middle.

017 

6.  Now, apply tape to the edges and press together.

 (1)

After taping, you will get something that looks like this…let’s call it a sunburst :)

018

7. Now, you punch a hole in the back of your sunburst…pull your ribbon through and tie a knot.

022

8. Congrats! The hardest part is over…and it wasn’t even hard! Now, just make as many sunbursts as you want. Then, cut a ribbon to be your banner and tie your sunburst ribbons to the banner.

003

Now you have something pretty to make any space happy :) When I get my apartment set up, I will have to take good pictures of the decor….until now, you are unfortunately stuck with this picture :(

Quote of the Day

collegeprobs

Social life and grades….without a doubt!


If you guys decide to make you own banner, let me know! I would love to see pictures :)


Friday, July 15, 2011

From blahhhh to hot dang!

So today I was thinking about how I want to get better with budgeting and money. I’m not horrible with money….but I could definitely benefit from keeping a closer eye on how much I spend, and what I buy. If you are like me, cute things are always more fun to use.

For example, why have a borrring check-book that looks like this:

check book

When you can have one that looks like this:

012
Isn’t that soooo much better?
I decided that maybe I would be more motivated to balance my check-book, if I had some eye-candy to look at while doing it :)
If you wanna make one for yourself, it is supaaa easy.


Materials 

1. One hot-mess of a check book
2. Some pretty fabric
3. Mod podge/ hot glue
4. Some cute buttons/ flower


Directions

1. Ok, take that aforementioned hot-mess of a check book, and cut your fabric to fit.


check book
I’m sorry, but I do not have a picture of this step, because it didn’t occur to me to do a tutorial until after I made the darn thing! But, you're a smart cookie, I'm sure you can figure it out without my grainy pictures :)  
*Note to self: Get a nice camera!

2. Next, mod-podge your fabric on top of the yucky checkbook and you will get something that looks like this.

008

3. Ok…so that is a definite improvement, but it needed a little somthin’ somthin’.

4. I decided to just find some coordinating buttons to add, but a rolled flower would be just as cute!


5. Hot glue those suckers on and you're done!


005


There ya go! You are now the proud owner of a cute little checkbook :)

....Now if you’ll excuse me, I’m off to write down the damage that I’ve done to my bank account lately. I only have to catch up from the last few months....ok year....


010

Quote of the Day

home quote


Happy Checking :)


Saturday, July 2, 2011

Lets make something together..shall we?

As girls, we are always on the hunt for something new and cute. My newest obsession has been with headbands.

My mom was gracious enough to model some of the ones I have made :)


Sophie decided to get in on the action.


Today, I thought it would be fun if we made one together :)

What you will need:
1. Hot glue gun, or a needle and thread (I prefer the glue because it is faster...and let's face it, I'm lazy...)
2. Fabric of your choice
3. Felt
4. A cute button


Now that you have your supplies gathered...we will start by cutting 6 circles out of fabric. This will be the base of your flower. You can choose whatever sized circle you would like. I used this template to make mine.


Next, cut out 5 smaller circles, using the template that I gave you, using a different, coordinating fabric. I chose to use lace.


After you have all of your circles ready, the fun begins. Take a large circle and cut a slit into the middle.

Then start folding. Fold a corner over to the front, then fold over to the back..and repeat until you have one petal. If you are using glue like me, glue every-time you fold the fabric over in order to make the fold stay. (I hope that makes sense and since we're all BFF's here, please ignore my chipped nails)


Once you have all of your big circles folded and glued, it is time to assemble the base. I formed a circle, and glued my felt to the circle.


Then, I started making my second layer. Take your small circles and use the same folding/gluing technique as you did with the large circles. Glue those to your base.


After that, add a cute button, and you're good to go! I decided to tie in my base fabric by making a button out of that. Attach your flower to a headband, and voila! A new accessory :)


I hope this made sense...this is my first time making a tutorial. If you have any questions, feel free to ask!

Happy Crafting :)

post signature