


Folks, I am f.r.e.a.k.i.n.g out! I fly back out to school in less than 5 days. 5 days people!
But, being my usual over-achieving self, I decided that there were a few more crafts that I wanted to make for my apartment.
For a friends birthday this past may, I made a picture clock of our most fun memories.
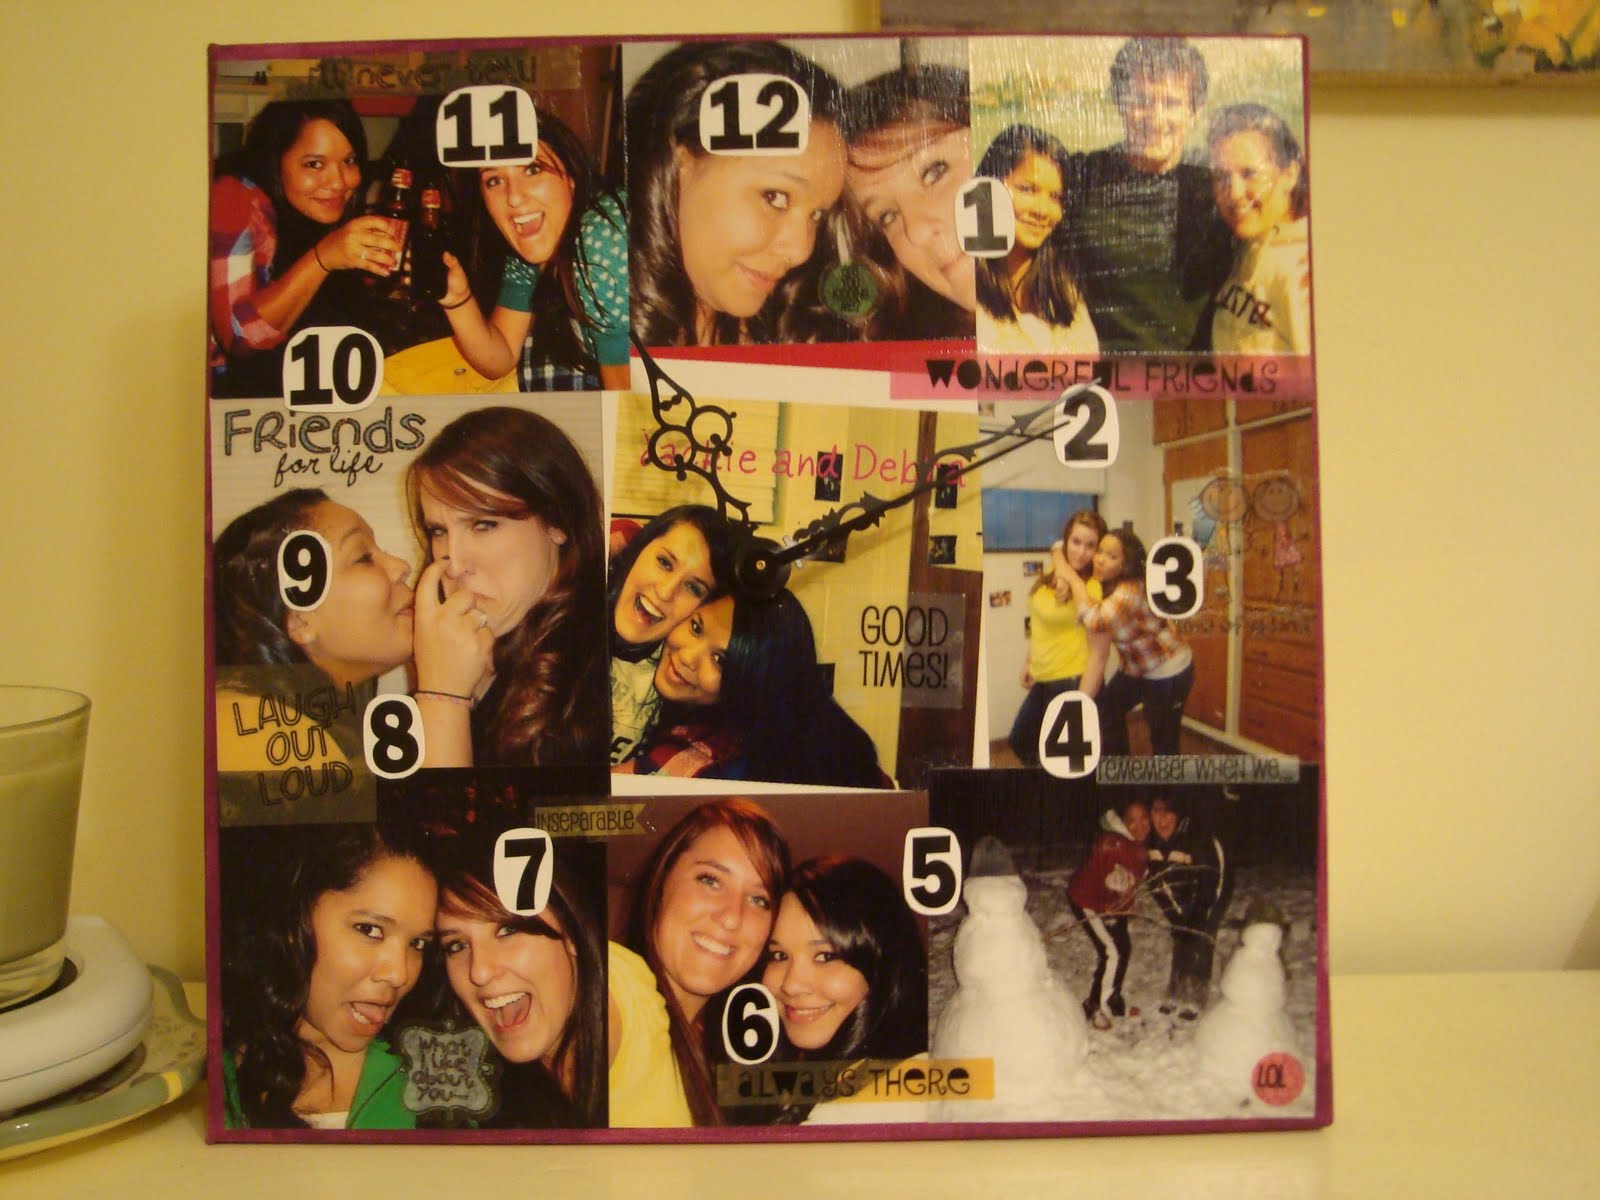
Shyler loved it and I was pretty happy with the way it turned out. It is colorful, fun, practical, and full of memories :)
I decided that I wanted to make a picture canvas of my own, minus the clock. So, I went to my local Hobby Lobby yesterday and got all of the necessary supplies.
Do you wanna know how I made it?
You will need
A canvas (whatever size you prefer)
Pictures
Mod Podge
A paintbrush
Paint (optional)
Fun Scrapbooking Stickers (optional)
How-to
1. I decided to paint my canvas so I would have color on the outside edges. This is completely optional though, so do whatever your little heart desires.

Sorry, I didn't think about doing a tutorial until I had already started......but imagine that the canvas is blank :)
2. Paint, or don't paint, your canvas :p

Notice that it does not have to be perfect, it will just be covered by pictures anyway.
3. Here comes the fun and time-consuming part. You have to go through all of your gorgeous (because let's face it, you're all supa dupa pretty), fun pictures and find the ones that you like the best :)
4. Once you have picked out some legit pictures, you are ready to design your canvas. I like to mix and max some pictures before I make a decision.

The big white circle is due to the flash on my camera....I need to learn how to take better pictures!
5. Ok, now that you have done all of that, you are ready to Mod Podge it all on.

I was probably the kid in Elementary School that huffed glue because I LOVE the smell of Mod Podge.....just sayin'.
6. After all of your pictures are glued down, take your Mod Podge and go to town on the front of your canvas. You want to make sure that everything is nice and sealed.
*Before I did this, I decided to add a few scrap-booking stickers to my canvas.

7. Do not be alarmed when you see this:

I promise it will dry nice and clear :)
8. After it dries, you will have a nice way to display some of your favorite photos!

In other news, today was my last day of work and I will miss little miss Isa tons!

I mean, how could you not love a face like that, and legs like these (Isa's, not mine).

Somebody get me a spoon because I could seriously eat her up!......in a totally non Hannible Lecter sort of way of course ;p
Quote of the Day

Stay tuned for another tutorial. I will be attempting to make my first pillow :)

2 comments:
so cute, even though you used non-cute pictures of me, your beauty makes up for it!
TEACH ME HOW TO MAKE A PILLOW!! I was seriously going to make one tomorrow for my couch so my apartment can be chic. ugggg
You are crazy Amy...you look super cute in the pictures :) Ok...so I'm scratching the pillow tutorial because I kept forgetting to take pictures while I was making it. But we should make some at school, I want to make another one. Only, we won't have a sewing machine.....
Post a Comment